Square Face Generator lets you build a personalized retro avatar by mixing and matching face parts — no drawing skills required. This guide walks you through everything, from opening the tool to saving your finished icon.

Step 1: Open the Generator
Go to squareface.me in any modern browser. No account, no download, no plugin needed — the editor loads instantly in the page.
You will see two main areas:
- Left panel — your live face preview, always updated as you make changes.
- Right panel — the parts library, where you pick and customize each feature.
Step 2: Pick Your Face Parts
Along the top of the right panel, you will find a row of tabs — one for each facial feature: Side Hair, Eye, Nose, Mouth, Cheek, and more.
Click any tab to open its selection screen. A grid of options will appear. Click the one you want, and your preview on the left will update immediately.
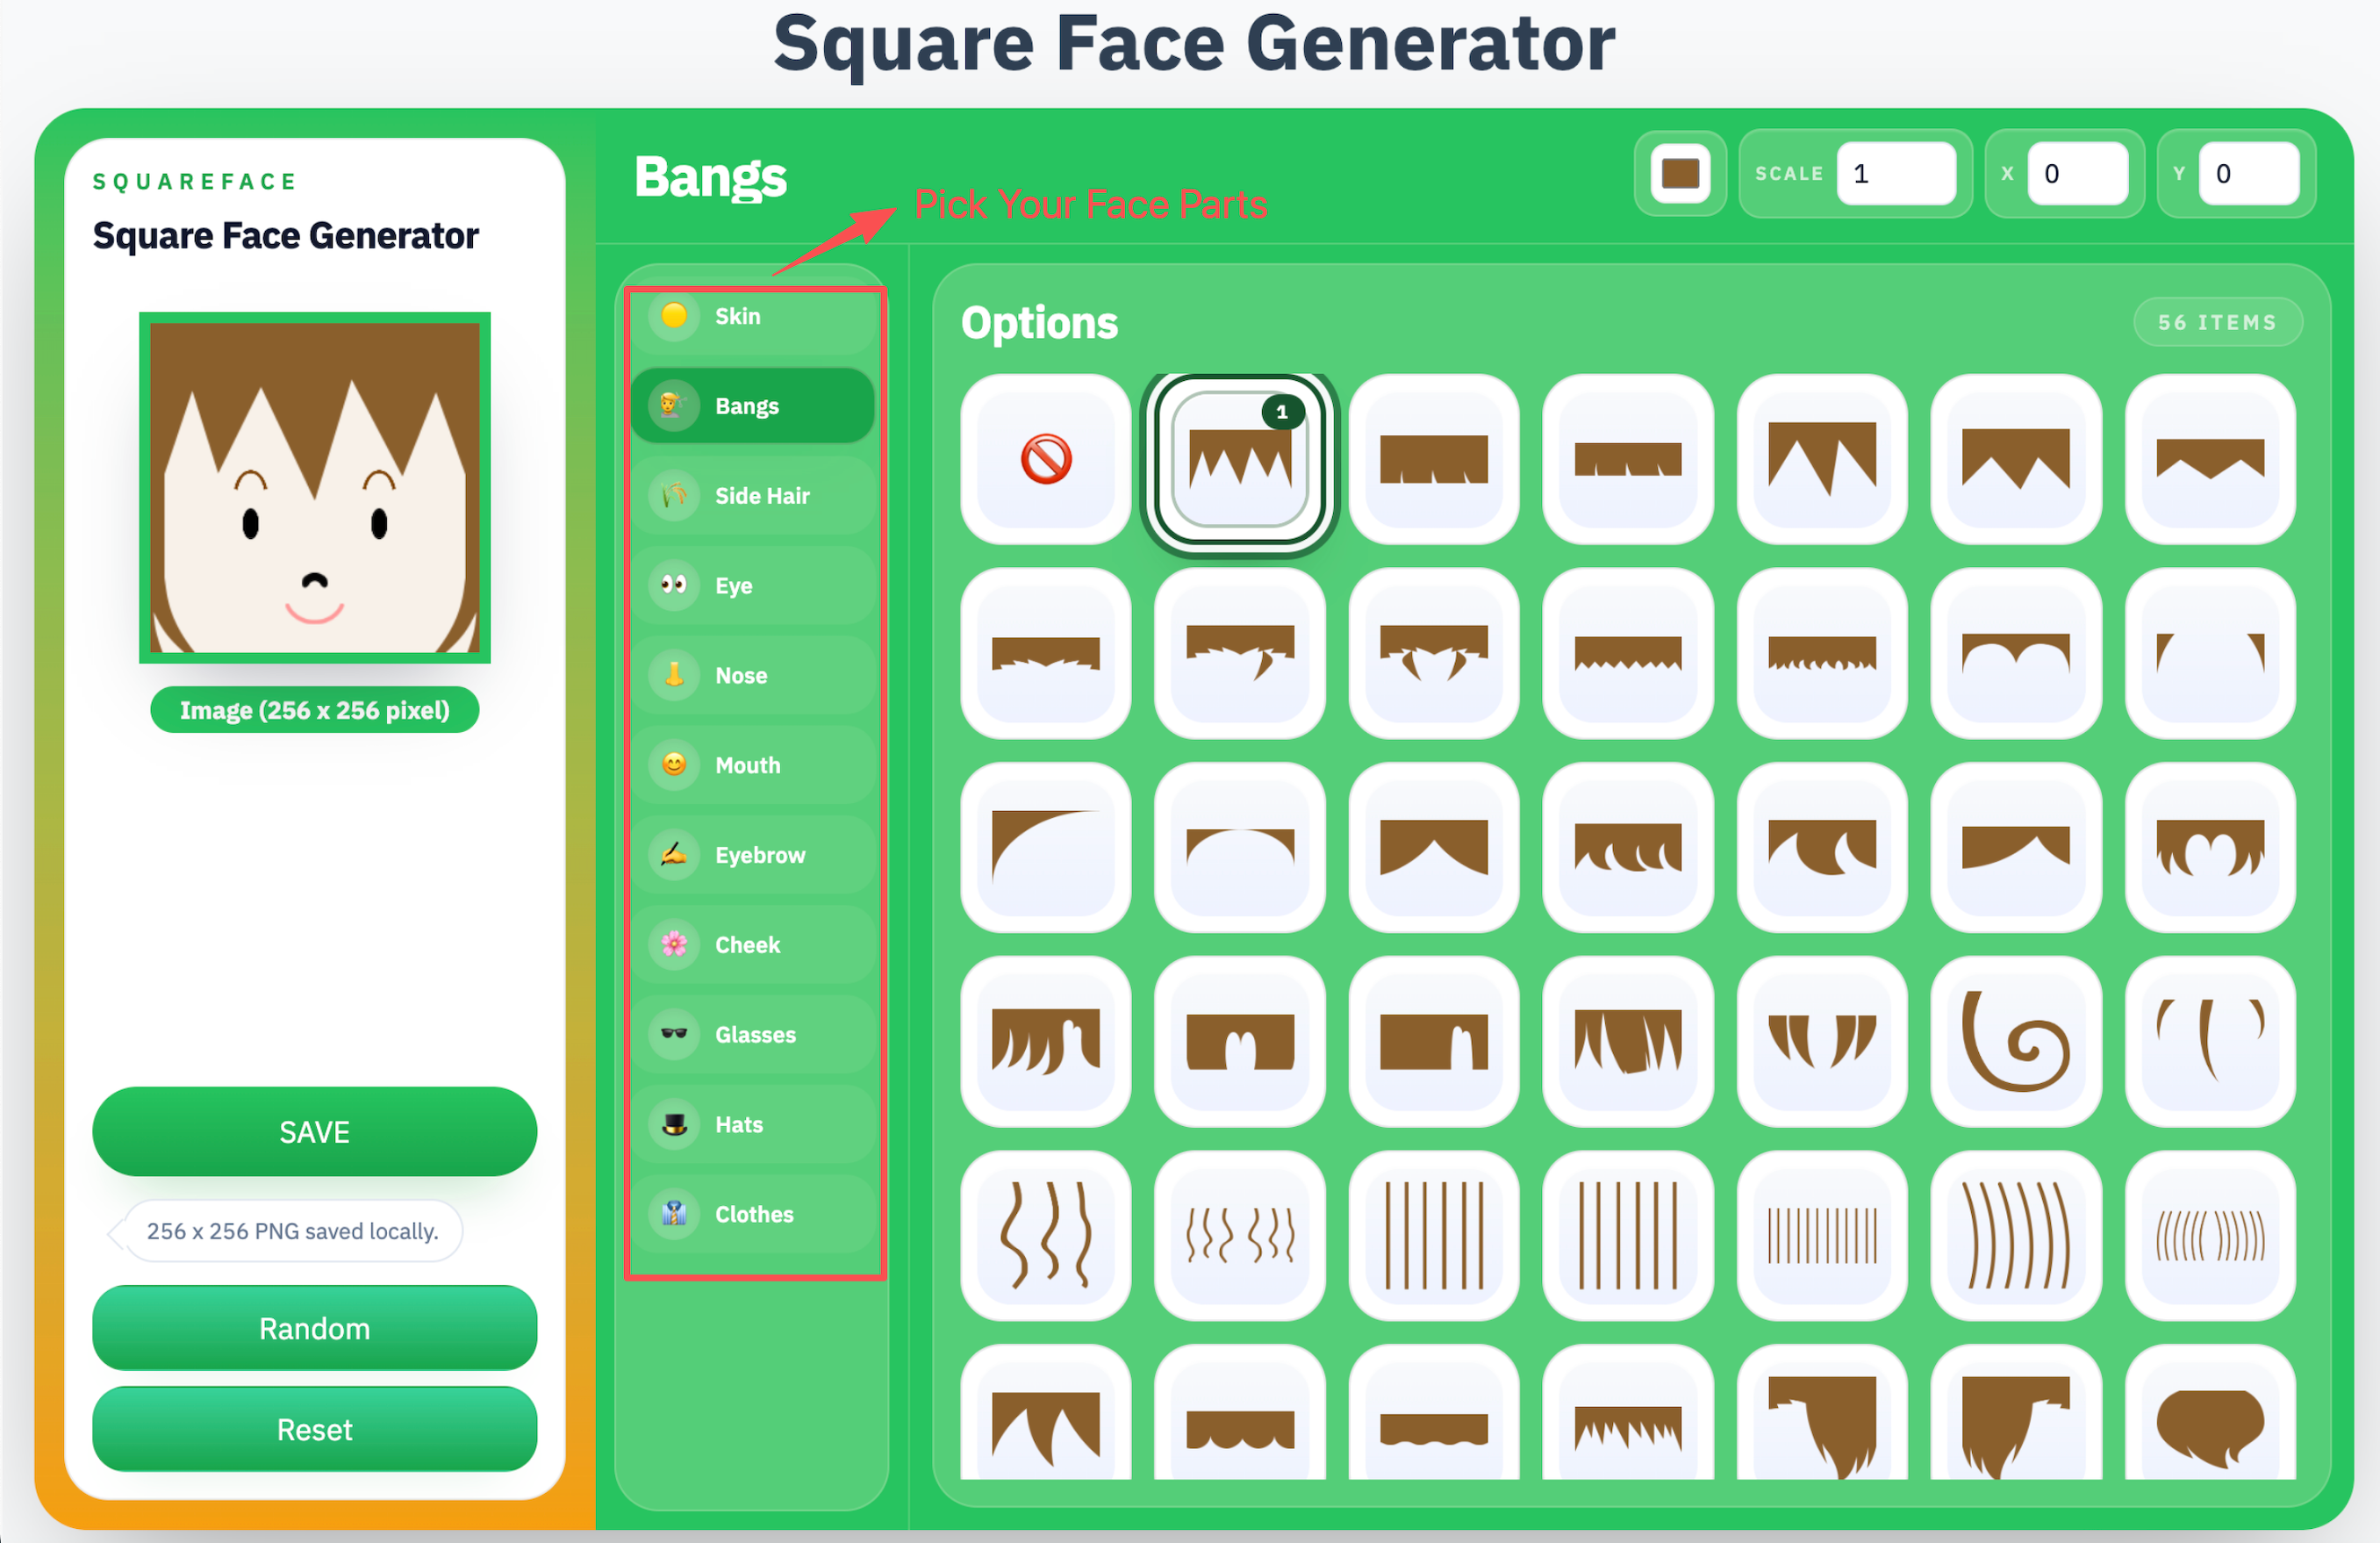
Repeat this for each tab until your face looks the way you want. There is no required order — jump between features freely.
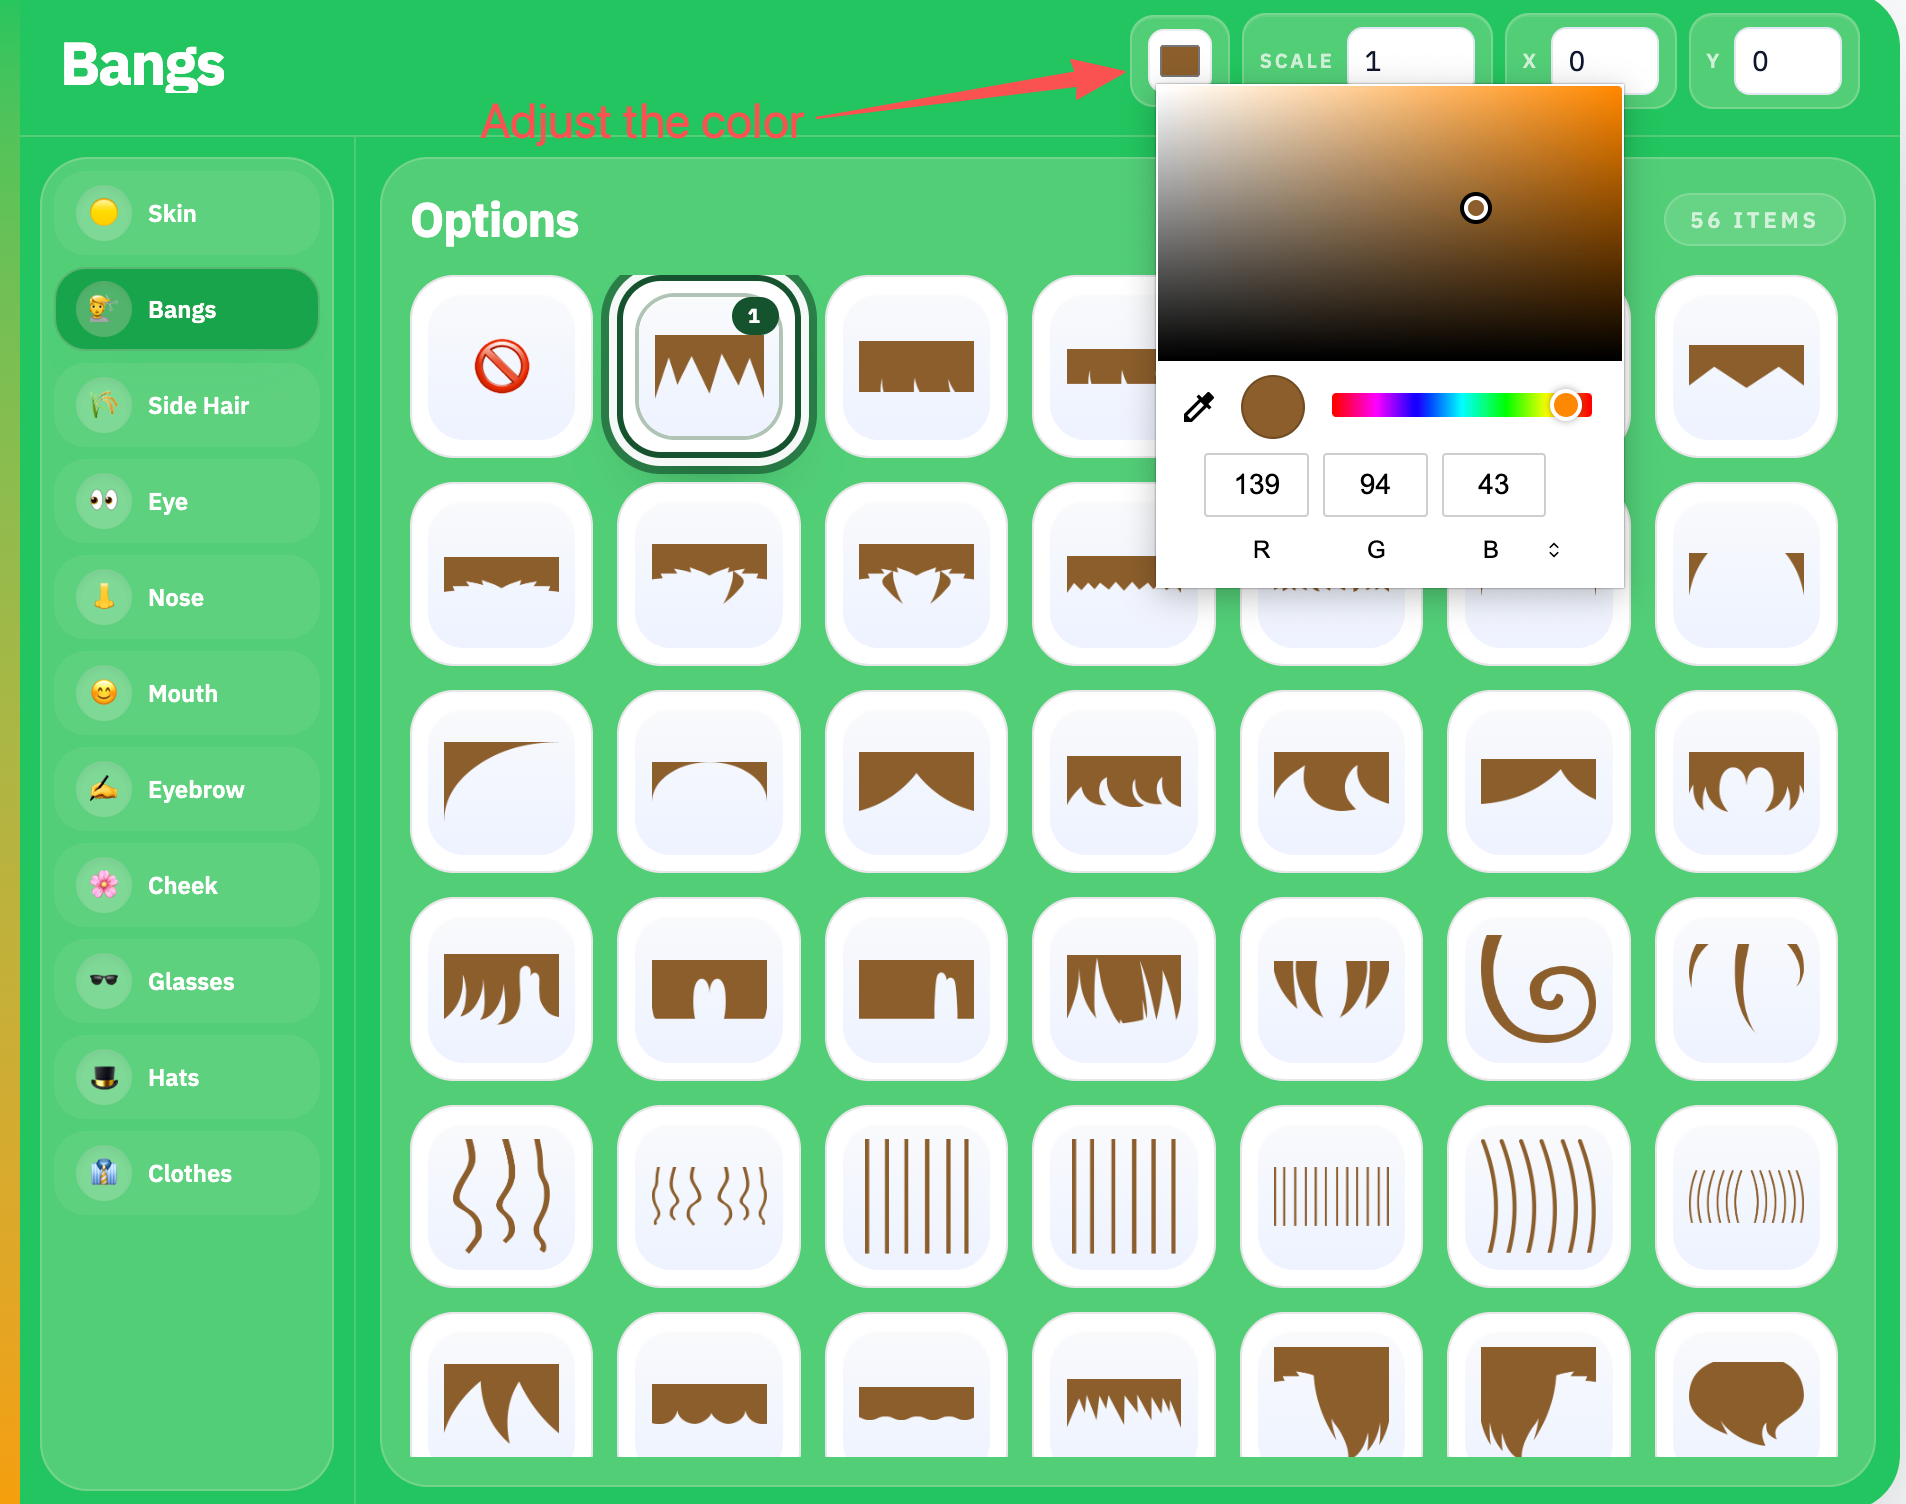
Step 3: Adjust the Colors
Once you have chosen a part, you can change its color using the color options shown alongside the selection grid. Click a color swatch to apply it to the selected part.
Each feature has its own color setting, so you can mix and match freely — for example, brown hair with black eyebrows, or a rosy cheek with a pale base.
Step 4: Try the Random Button
Not sure where to start? Hit the Random button at the bottom of the left panel.
The generator will instantly pick a random combination of parts across all categories. Colors are not changed by Random — only the part shapes. A few optional details like moles or beards may also not be included in the random selection, so you can add those manually afterward if you want them.
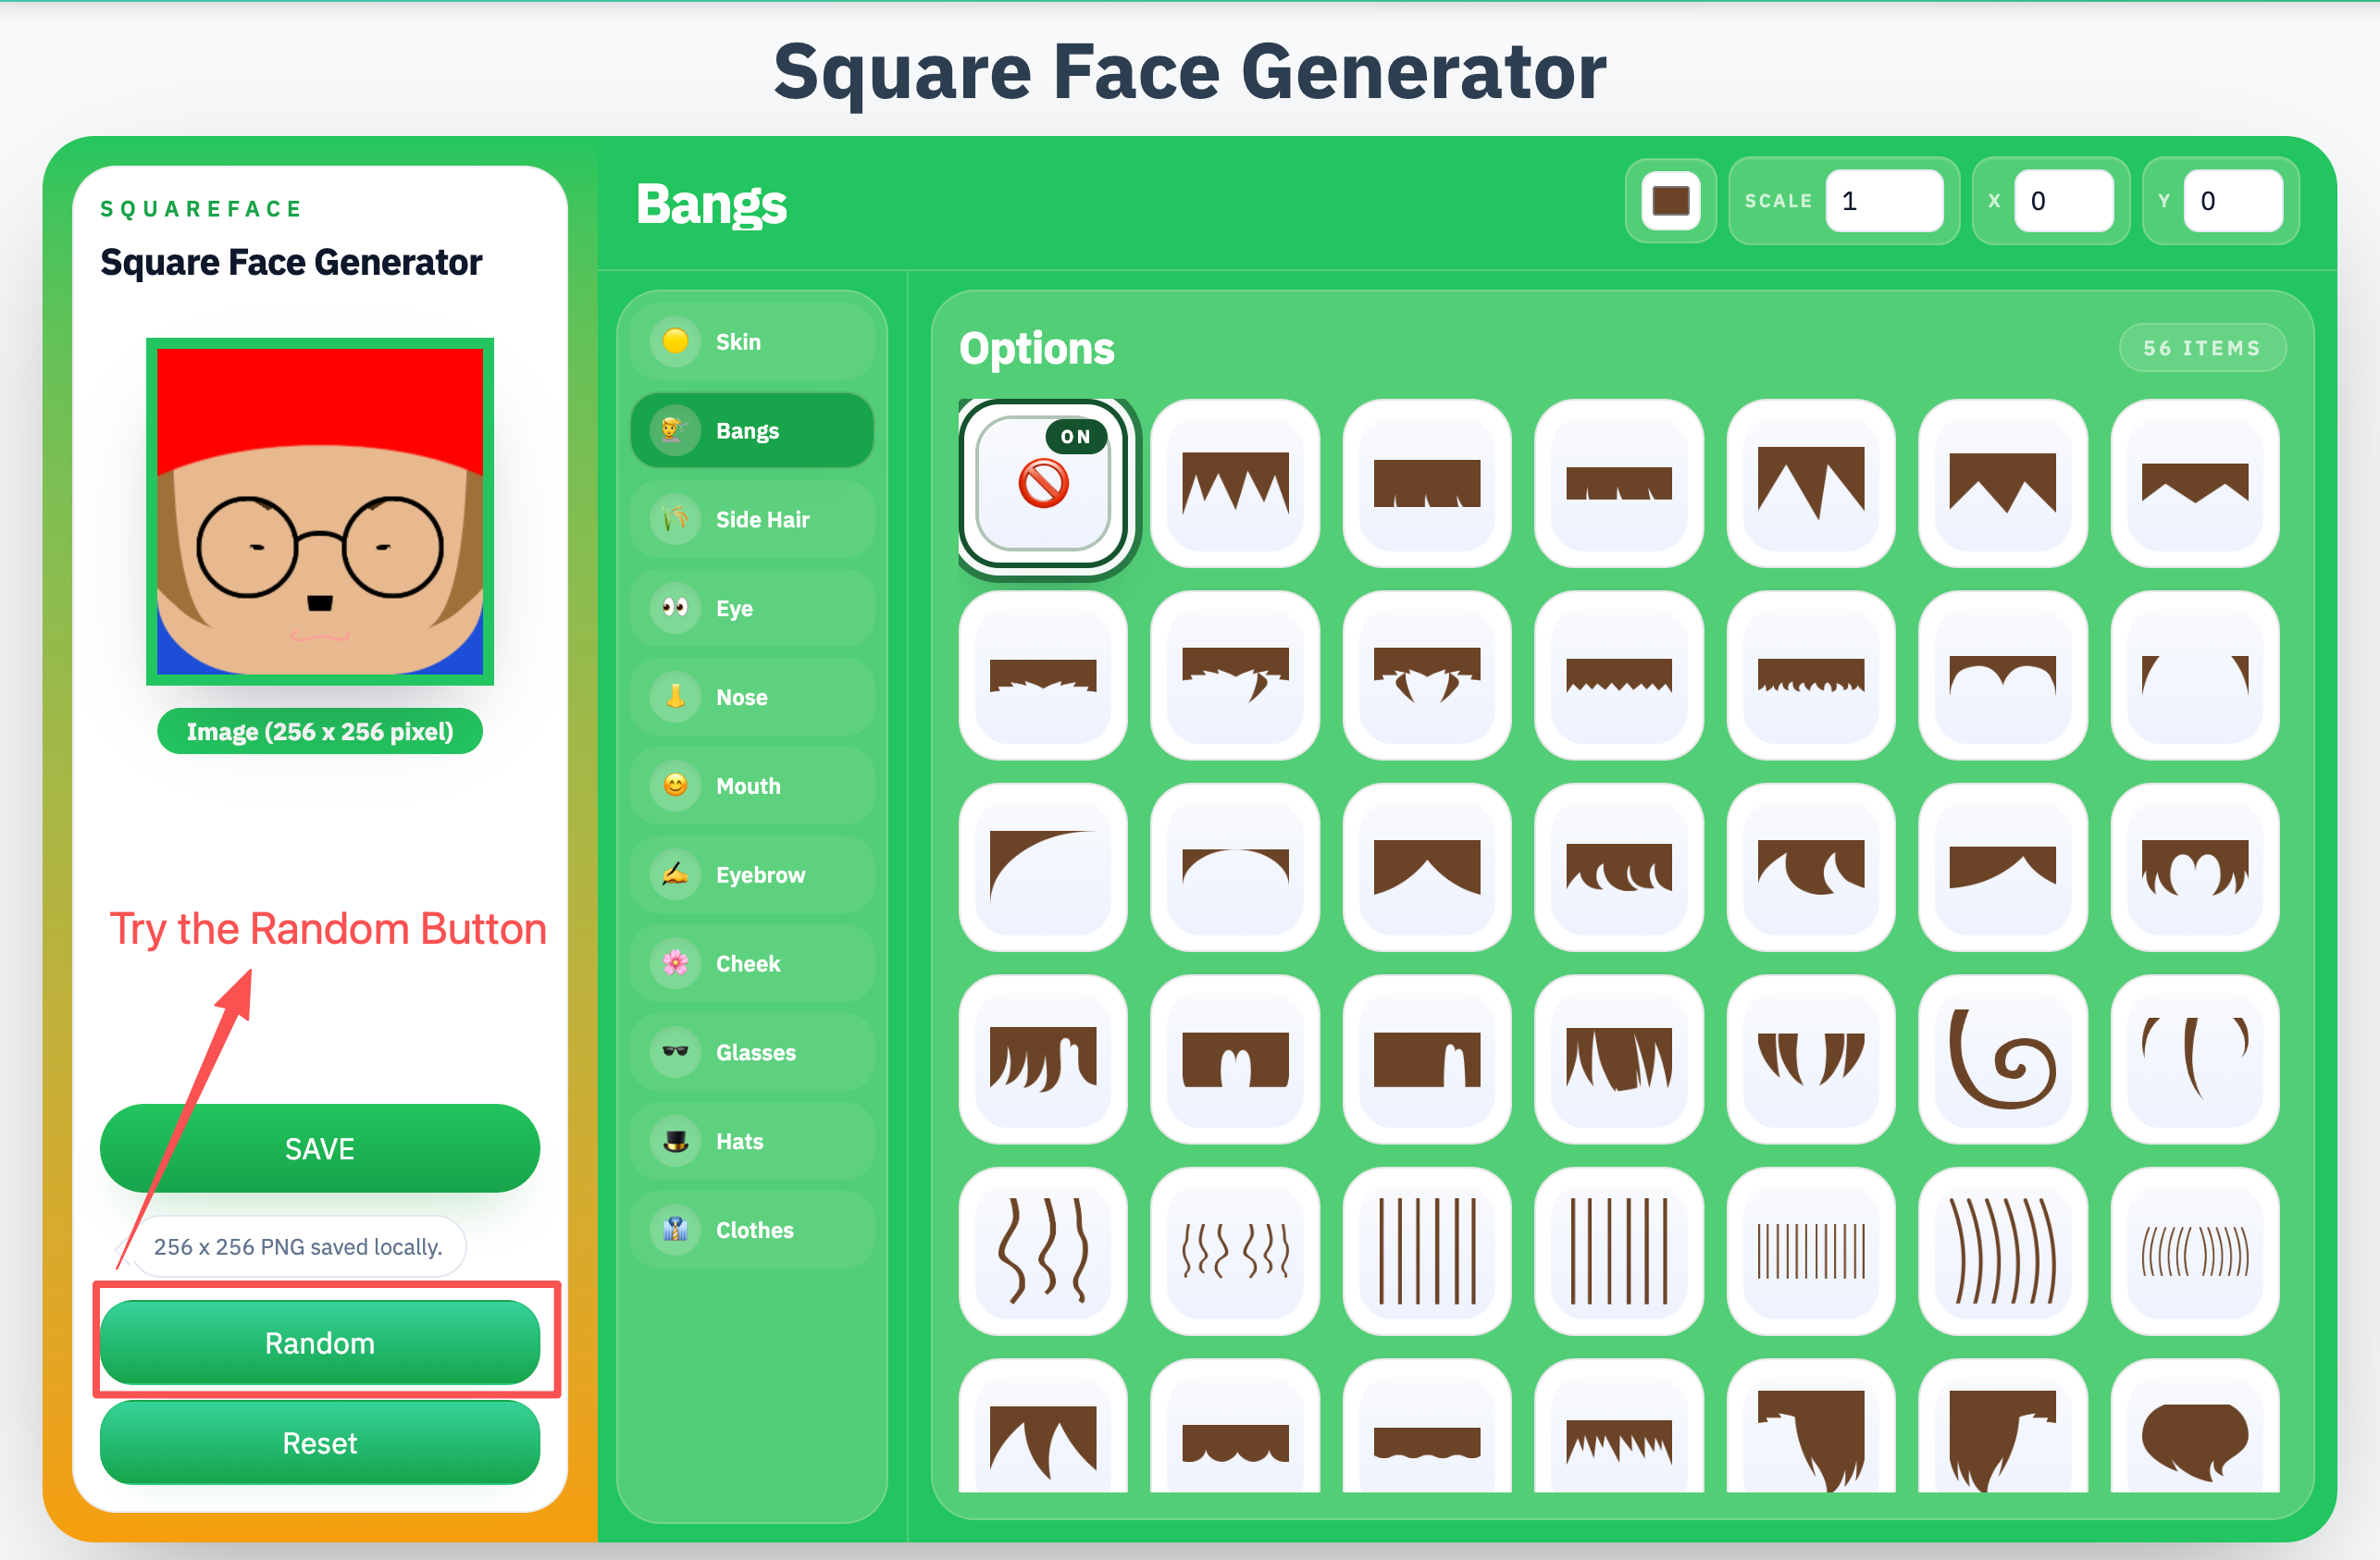
Random is a great way to discover combinations you would not have thought of yourself.
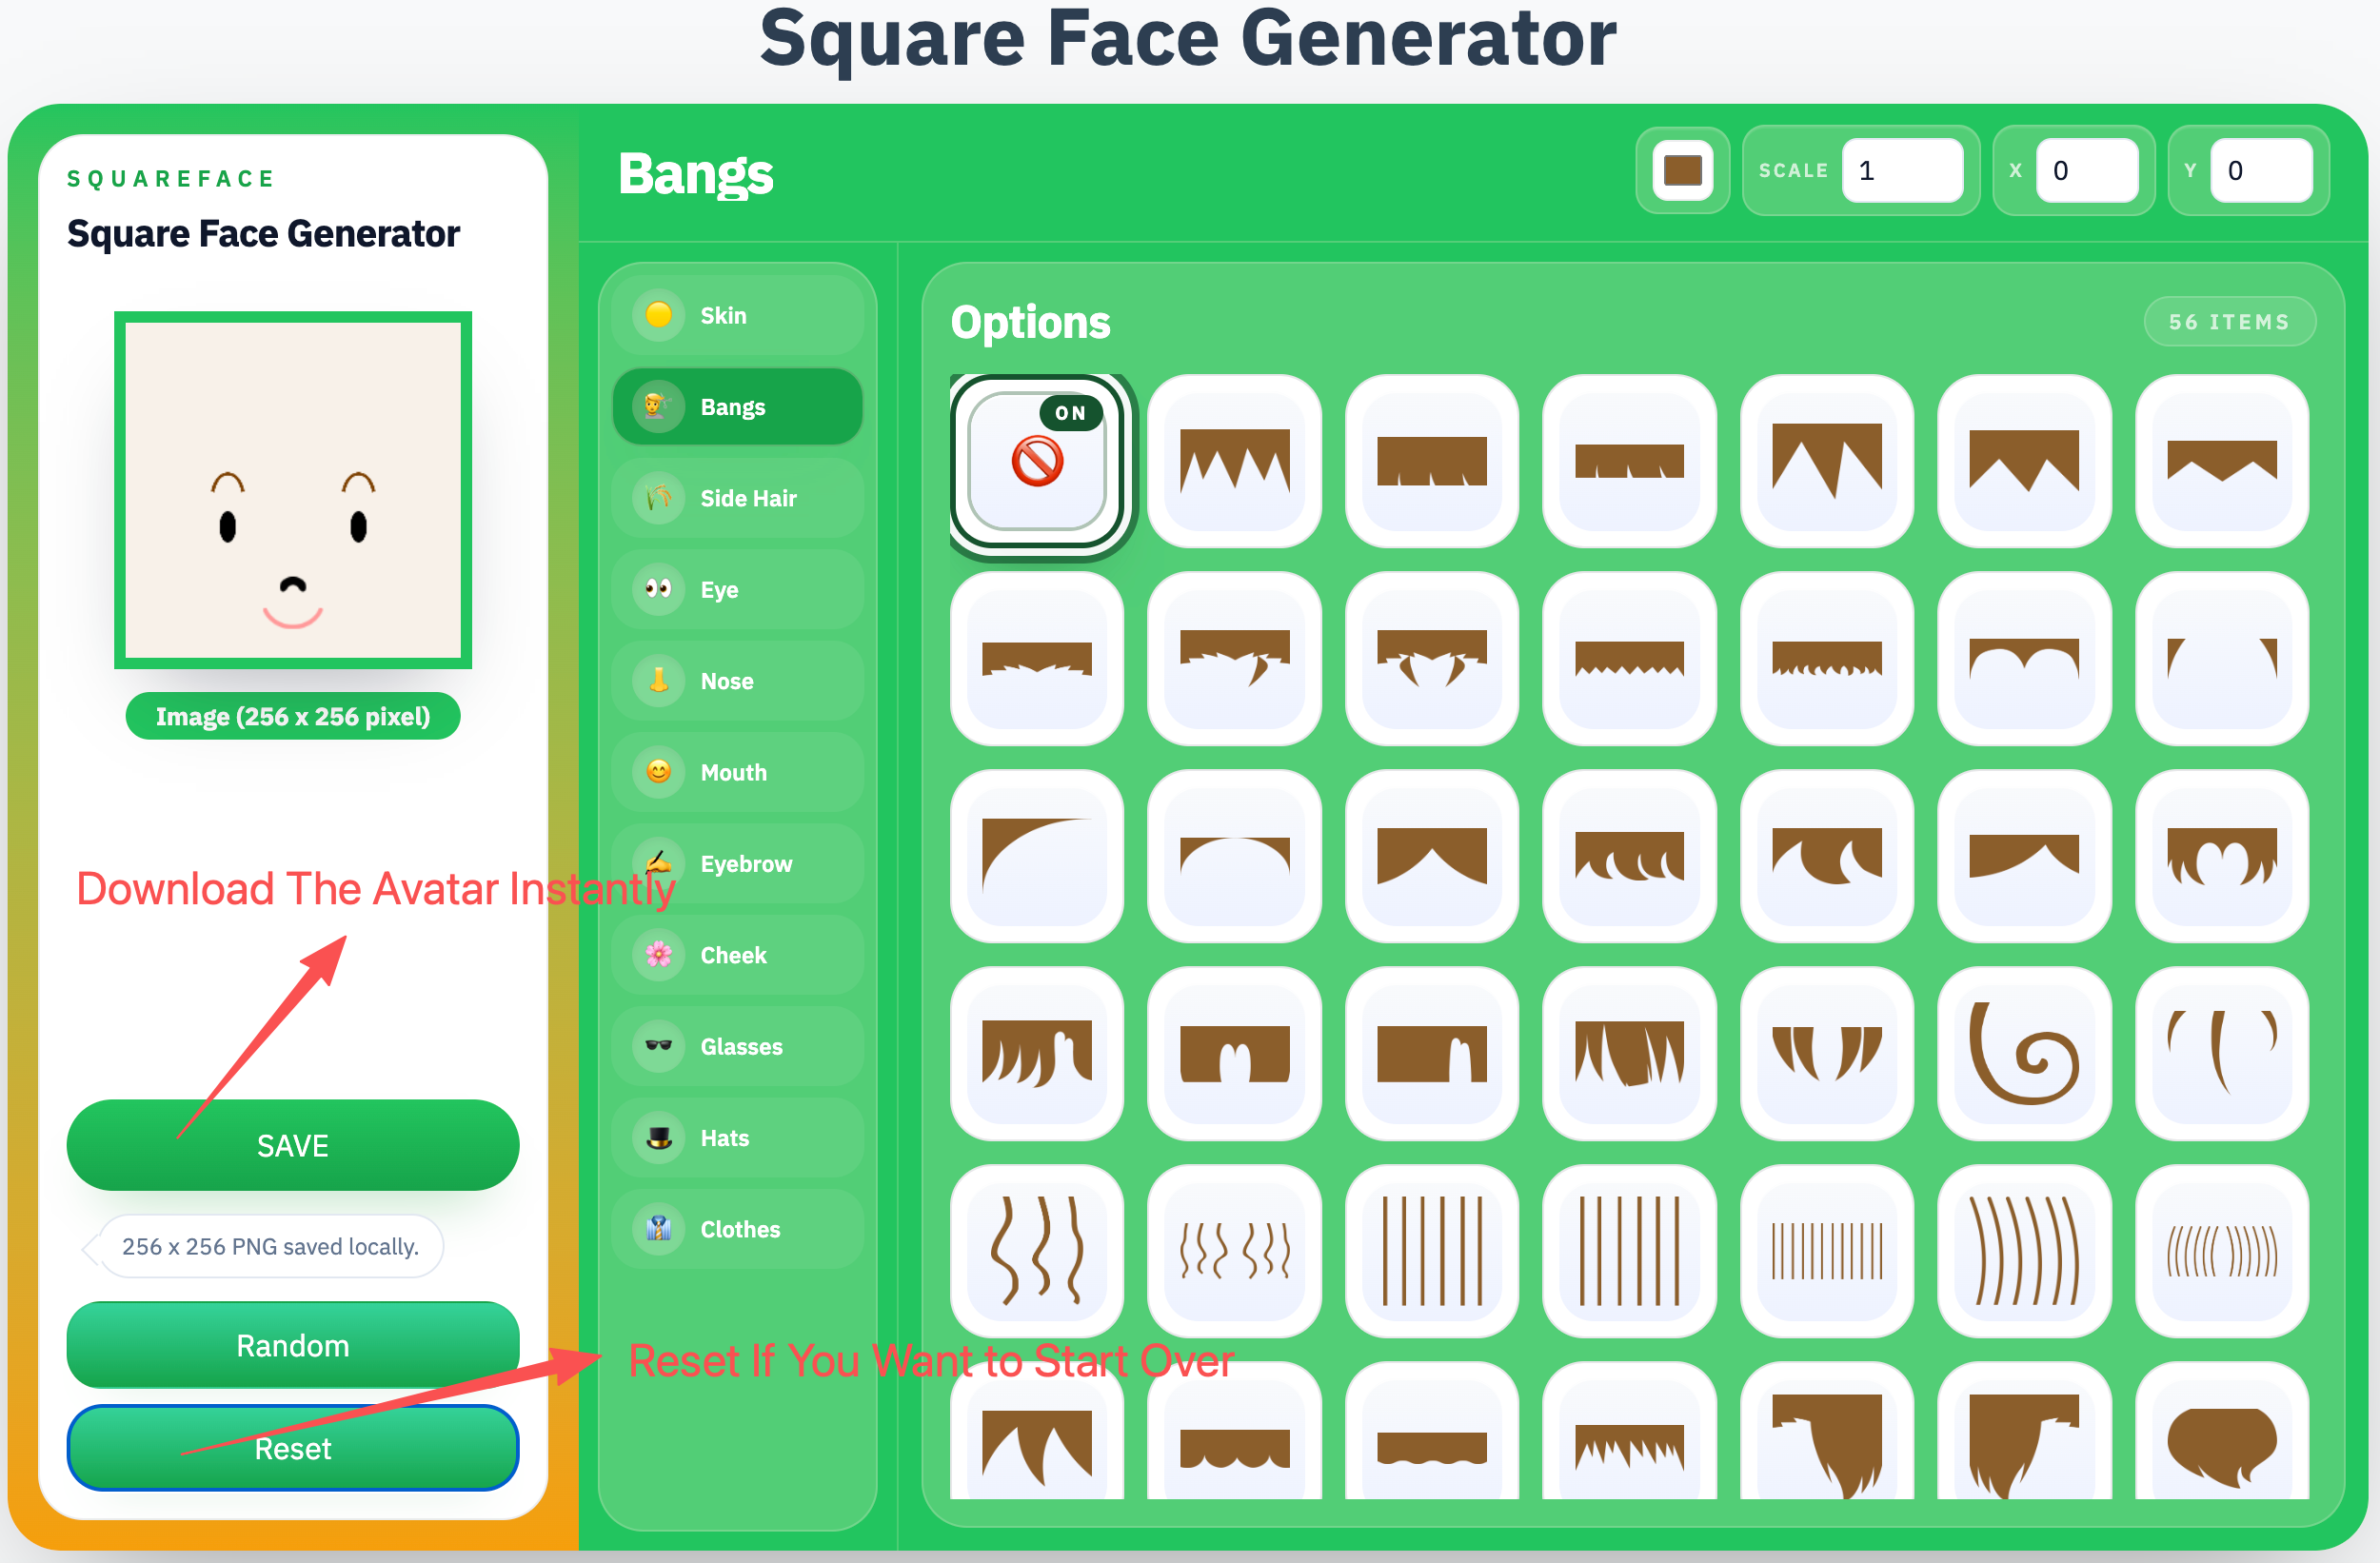
Step 5: Reset If You Want to Start Over
If you want to clear everything and start fresh, press the All Reset button. This returns every part to its initial (blank or default) state without reloading the page.
This is useful if you have gone too far down a path and want a clean slate rather than undoing changes one by one.
Step 6: Save Your Avatar
When you are happy with the result, click the SAVE button.
The generator will export your avatar as a 256 × 256 pixel PNG and save it directly to your local disk. No upload, no cloud account — the file downloads straight to your device.
That PNG is ready to use as a profile picture, a forum avatar, a Discord icon, or anywhere else you want to put a small square face.
Bonus: Check the Terms of Use
If you plan to use your avatar commercially — for a channel, a brand, or paid content — review the site's Terms of Use page first. It explains the usage rules for generated images so you know exactly what is permitted.
For personal use, you are free to go ahead and post it immediately.
Three Generators, One Family
Square Face Generator is part of a growing set of tools at squareface.me:
- Square Face Generator — the classic boxy style with clean lines
- Oval Face Generator — softer, rounder proportions
- Pixel Face Generator — a pure pixel-art aesthetic
All three follow the same interface and workflow, so once you know how to use one, you can use all of them. Each has its own expanding parts library, so there is always something new to try.
Making your avatar takes about two minutes once you get the hang of it. Go ahead and build one — and you do not need to wonder if it is too childish to post. Everyone is already posting theirs.